

Compare Templates
Compare Templates provides a detailed side-by-side comparison of two view templates, showing parameter values and controlled status in the Template Manager workspace. Use it to troubleshoot unexpected view behavior, standardize templates across your project, or understand the differences between similarly-named templates.
Getting Started
Section titled “Getting Started”Find Template Manager on the Amorphous ribbon tab in the Data Tools panel, then open the Compare Templates tab.
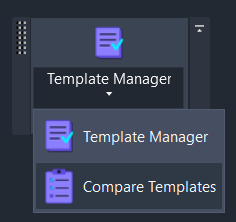
To access Compare Templates:
- Navigate to the Amorphous tab
- Find the Data Tools panel
- Click Template Manager
- Open the Compare Templates tab
The command requires an open Revit document with at least two view templates to compare.
Features
Section titled “Features”- Side-by-side parameter comparison - View all template parameters in a single table with both values displayed
- Controlled status visibility - See which parameters are controlled by each template
- Difference highlighting - Parameters with different values are highlighted for easy identification
- Difference-only filtering - Toggle to show only parameters that differ between templates
- Category grouping - Parameters organized by Revit parameter group for easier navigation
- Status indicators - Clear visual feedback showing “Different” or “Same” for each parameter
How to Use
Section titled “How to Use”Basic Workflow
Section titled “Basic Workflow”- Open Template Manager from the ribbon
- Select the Compare Templates tab
- Select Template A from the first dropdown
- Select Template B from the second dropdown
- Click Compare to analyze the templates
- Review the results in the comparison grid
Selecting Templates
Section titled “Selecting Templates”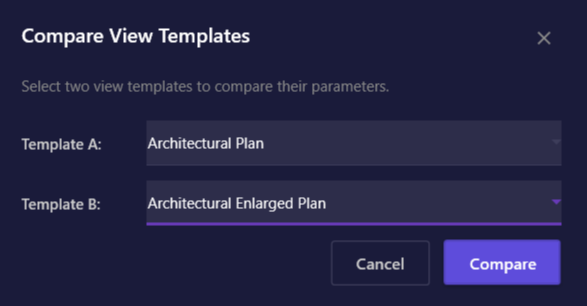
The Compare Templates tab lists all view templates in your project alphabetically. Use the dropdowns to select the two templates you want to compare:
| Element | Description |
|---|---|
| Template A | The first template (displayed in left column of results) |
| Template B | The second template (displayed in right column of results) |
| Compare | Analyzes both templates and fills the comparison grid |
Reviewing Results
Section titled “Reviewing Results”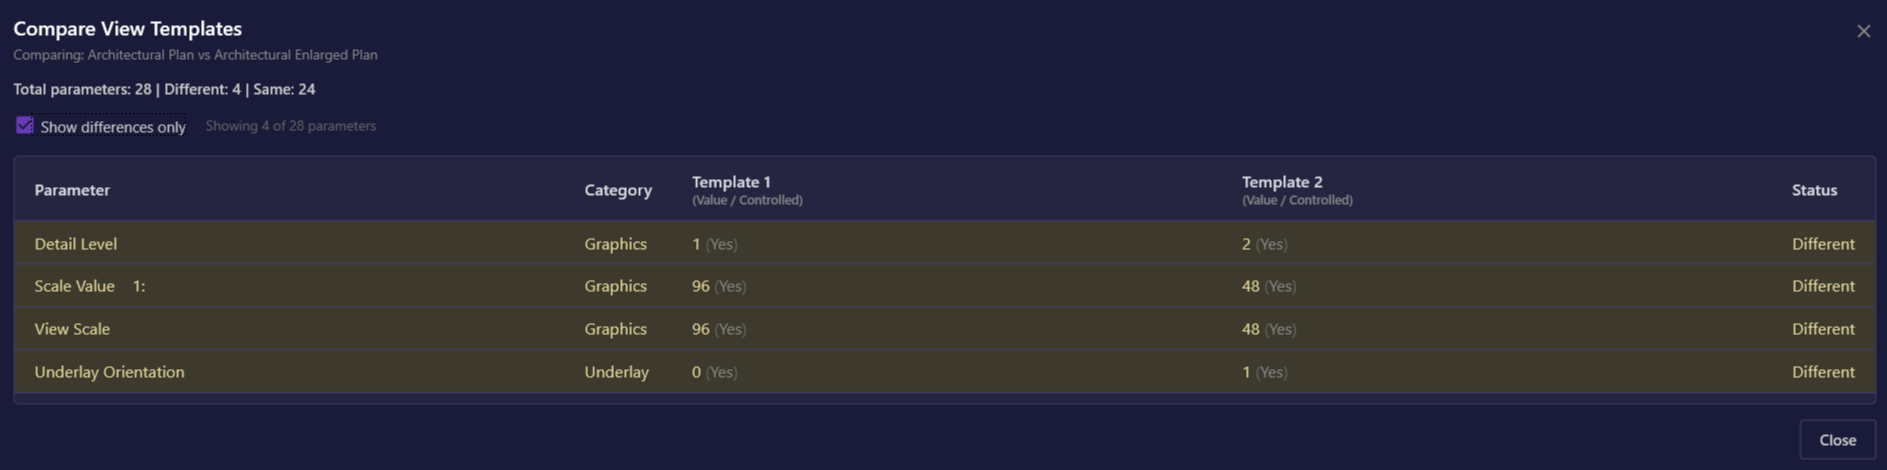
The comparison grid displays all parameters from both templates:
| Column | Description |
|---|---|
| Parameter | The parameter name (e.g., “V/G Overrides Model”, “Detail Level”) |
| Category | The parameter category grouping (e.g., “Graphics”, “Extents”) |
| Template A | Value and controlled status for the first template |
| Template B | Value and controlled status for the second template |
| Status | Shows “Different” or “Same” for quick scanning |
Understanding the Value/Controlled display:
Each template column shows the parameter value followed by its controlled status in parentheses:
Standard (Controlled)- Parameter value is “Standard” and the template controls this parameterCoarse (Not controlled)- Parameter value is “Coarse” but the template does not control it(not set) (Not controlled)- Parameter has no value and is not controlled
Filtering to Differences
Section titled “Filtering to Differences”Use the “Show differences only” checkbox to focus on what matters:
- Checked (default) - Shows only parameters where the templates differ
- Unchecked - Shows all parameters from both templates
The filter info text (e.g., “Showing 12 of 87 parameters”) indicates how many parameters are currently displayed versus the total analyzed.
User Interface
Section titled “User Interface”Compare Templates Tab
Section titled “Compare Templates Tab”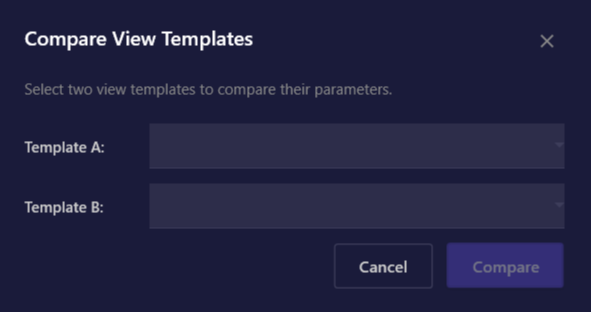
| Element | Purpose |
|---|---|
| Template A dropdown | Select the first template to compare |
| Template B dropdown | Select the second template to compare |
| Validation message | Displays error if invalid selection (e.g., same template twice) |
| Compare button | Runs the comparison (enabled when valid selection made) |
| Maximize button | Expands the compare area for review |
Keyboard shortcuts:
Enter- Click Compare (when enabled)
Comparison Results
Section titled “Comparison Results”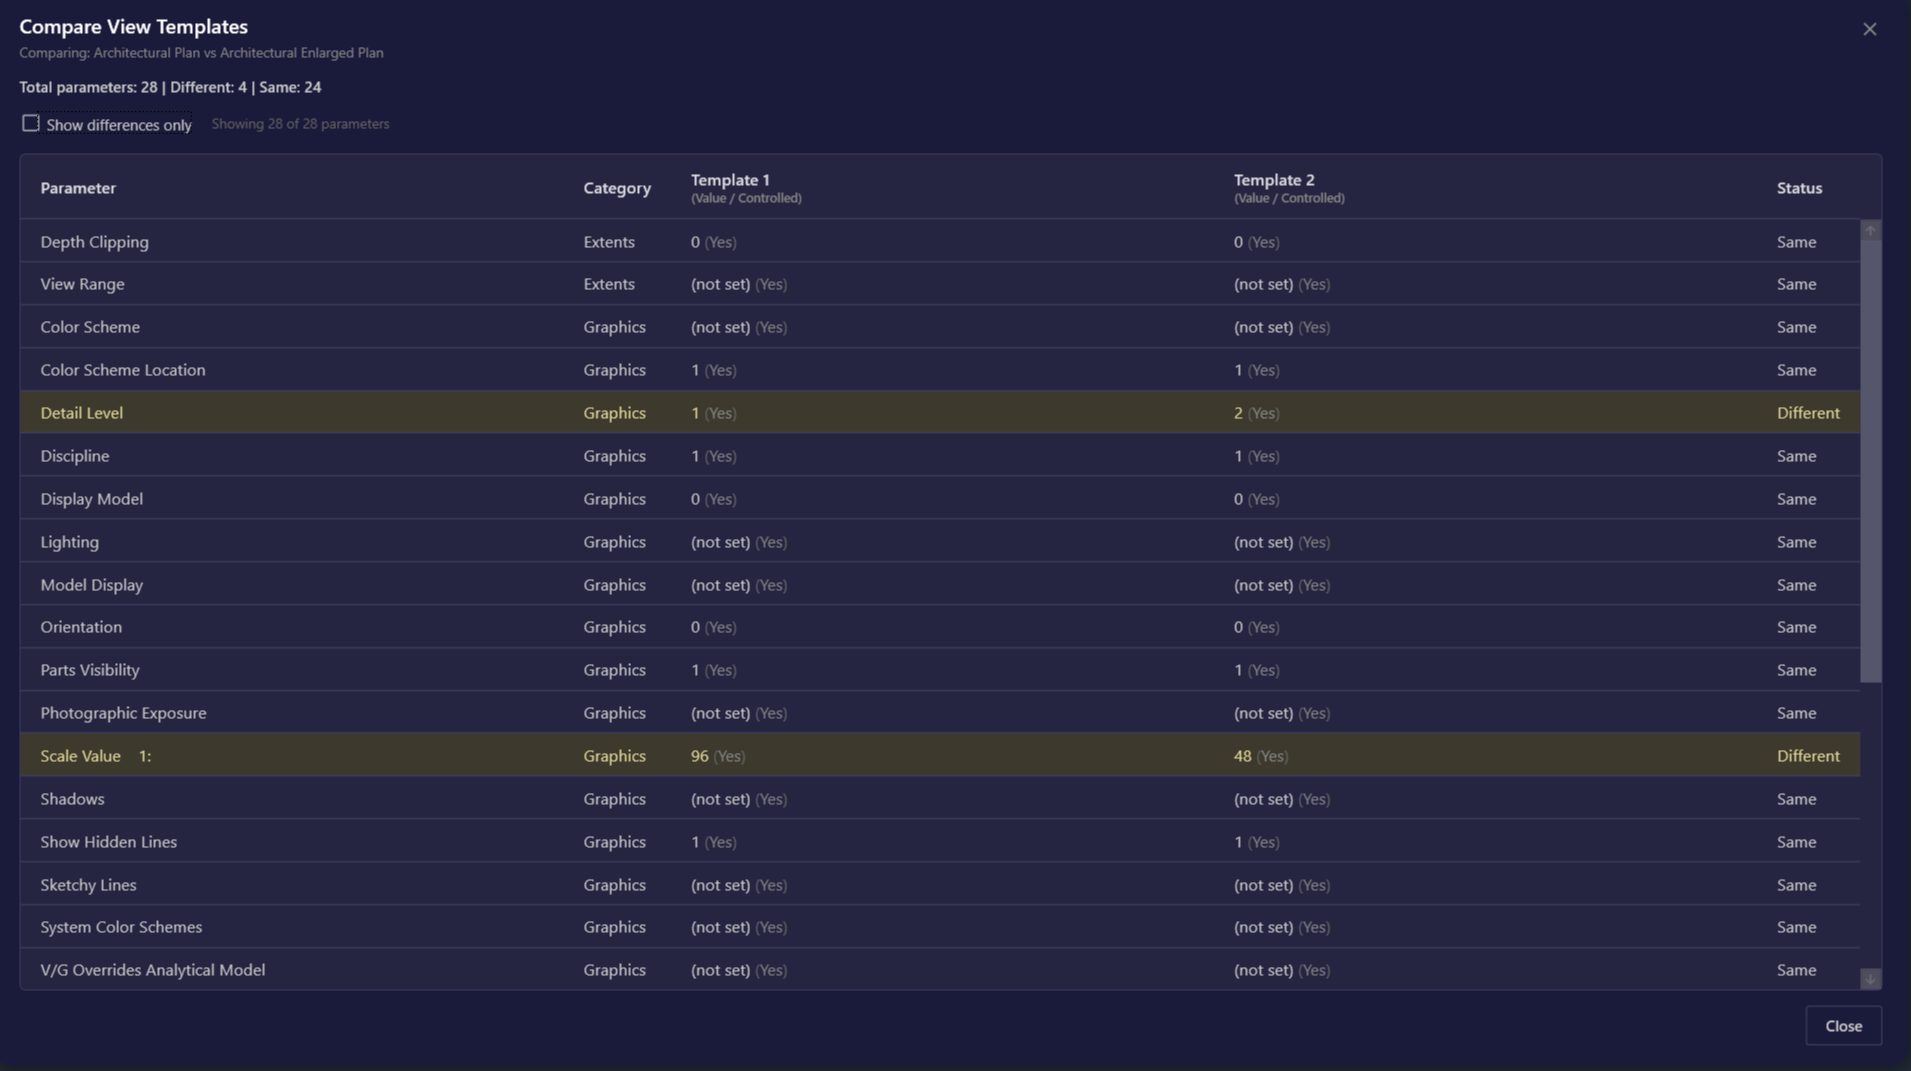
| Element | Purpose |
|---|---|
| Summary | Shows total parameters and number of differences found |
| Show differences only | Checkbox to filter the parameter list |
| Filter info | Shows count of visible vs. total parameters |
| Parameter table | Scrollable grid with all comparison data |
| Close button | Closes or collapses the compare view |
Visual indicators:
- Amber/yellow row background - Parameter has different values between templates
- Standard row background - Parameter values are the same
Keyboard shortcuts:
ESC- Close the window- Arrow keys - Navigate rows in the table
Use Cases
Section titled “Use Cases”| Scenario | How Compare Templates Helps |
|---|---|
| Troubleshooting view differences | Compare the template assigned to a “correct” view with a “problem” view to find the parameter causing issues |
| Standardizing templates | Compare office standard template with project template to identify deviations |
| Template cleanup | Compare similarly-named templates to determine if they’re duplicates that can be consolidated |
| Documentation | Export template differences for project handoff or QA documentation |
| Learning templates | Compare a working template with default to understand what parameters were customized |
| Migration verification | After copying templates between projects, verify all parameters transferred correctly |
Options & Settings
Section titled “Options & Settings”Default Filter State
Section titled “Default Filter State”| Option | Default | Description |
|---|---|---|
| Show differences only | On | When enabled, only shows parameters with different values |
Window Behavior
Section titled “Window Behavior”- Modeless - Compare stays inside Template Manager so Revit remains usable
- Resizable workspace - Use the manager window or compare maximize control to give the grid more space
- Persistent during review - Switch between audit and compare tabs without reopening the tool
- Start with differences - Keep “Show differences only” enabled to quickly identify what varies between templates, then uncheck to see the full picture
- Check controlled status - A parameter might have the same value in both templates but only be controlled by one; check the controlled status when troubleshooting
- Use meaningful names - Give templates descriptive names so they’re easy to identify in the dropdown lists
- Compare in pairs - If you need to compare multiple templates, do pairwise comparisons (A vs B, then A vs C) to build a complete picture
- Look at categories - Use the Category column to focus on specific parameter groups (Graphics, Extents, etc.)
- For audit purposes - Use Template Manager to identify which templates are in use, then switch to the Compare Templates tab for specific pairs
Limitations
Section titled “Limitations”| Limitation | Details |
|---|---|
| Two templates only | Each comparison analyzes exactly two templates; for more, run multiple comparisons |
| Read-only | Compare Templates only displays differences; use Revit’s native template editor to make changes |
| Parameter values | Some complex parameters may display as “(not set)” if the API cannot retrieve their values |
| No export | Results cannot be exported directly; use screenshots or Template Manager’s Excel export for documentation |
| Linked models | Only compares templates in the active document, not linked models |
Troubleshooting
Section titled “Troubleshooting”Compare button stays disabled
Section titled “Compare button stays disabled”This happens when:
- The same template is selected in both dropdowns
- One or both dropdowns have no selection
Solution: Select two different templates from the dropdowns.
Many parameters show “(not set)”
Section titled “Many parameters show “(not set)””Some template parameters are not accessible via the Revit API, particularly for internal or specialized settings.
Workaround: Focus on the parameters that do show values; the most common graphics and visibility settings are typically available.
No differences found but views look different
Section titled “No differences found but views look different”If Compare Templates shows no differences but views using these templates look different:
- Verify you’re comparing the correct templates
- Check if views have local overrides that bypass the template
- Some visual differences may come from workset visibility or linked model settings not controlled by view templates
Comparison appears blank or takes time
Section titled “Comparison appears blank or takes time”This may occur with very complex templates or in large projects.
Solution: Wait a few seconds for the comparison to complete. If the issue persists, switch tabs or close and reopen Template Manager.
Related Tools
Section titled “Related Tools”- Template Manager - Audit template usage across sheets and views, apply templates in bulk
- Transfer VG - Copy visibility/graphics settings between views
- QuickVis - Quick visual style changes and overrides