Section Box Manager
Section Box Manager lets you save section box configurations with names, load them instantly, and share them with team members via JSON export/import. Instead of manually recreating section boxes each time you need a specific view crop, you can build a library of reusable configurations that persist across Revit sessions.
Getting Started
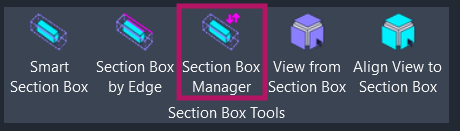
Section titled “Getting Started”Find Section Box Manager on the Amorphous ribbon tab in the Section Box Tools panel.
The button is enabled when a Revit document is open. The Save function requires:
- Active view is a 3D view
- Section box is enabled and visible
Features
Section titled “Features”- Save section boxes - Capture section box configurations with custom names and automatic thumbnail previews
- Instant load - Apply saved section boxes to any 3D view with a double-click
- Search and filter - Real-time search by name, view, or date; filter by Native/Imported source
- Sort options - Sort by Date, Volume, or Name in ascending/descending order
- Pin favorites - Keep frequently-used section boxes at the top of the list
- Volume display - Automatic volume calculation shown in human-readable format
- Team collaboration - Import/export via JSON files with conflict resolution
- Thumbnail preview - Hover over items to see a visual preview
- Multi-select operations - Delete multiple section boxes at once
- Project-specific storage - Data persists between sessions, stored per project
How to Use
Section titled “How to Use”Saving a Section Box
Section titled “Saving a Section Box”- Set up your view - Navigate to a 3D view and create a section box using Smart Section Box or Section Box by Edge
- Open Section Box Manager - Click the button on the ribbon
- Click SAVE - Enter a name for the configuration (a suggested name like “Section Box 01” is provided)
- Thumbnail captured - The window briefly hides to capture a screenshot of your view
The section box is now saved and appears in the list.
Loading a Section Box
Section titled “Loading a Section Box”- Find the configuration - Scroll the list or use search/filters
- Load it - Double-click the item, or select it and click LOAD
- Section box applied - The saved section box is applied to your active 3D view
Pinning Favorites
Section titled “Pinning Favorites”Click the pin icon on any list item to keep it at the top of the list. Pinned items remain at the top regardless of sort order.
Searching and Filtering
Section titled “Searching and Filtering”Search: Type in the search box to filter by name, view name, or creation date.
Filter chips:
| Filter | Shows |
|---|---|
| Native | Section boxes created in the current project |
| Imported | Section boxes imported from other projects |
Both filters can be active simultaneously (shows items matching either filter).
Sorting
Section titled “Sorting”Click a sort chip to change the sort order:
| Sort Option | Description |
|---|---|
| Date | Sort by creation date (default) |
| Volume | Sort by section box volume (largest/smallest) |
| Name | Sort alphabetically |
Click the arrow button to toggle between ascending and descending order.
Sharing Section Boxes
Section titled “Sharing Section Boxes”Exporting
Section titled “Exporting”
- Click EXPORT - Opens the Export Options dialog
- Choose scope:
- Export selected items only - Only exports items currently selected in the list
- Export all items - Exports your entire collection
- Optional: Check Only export items created in this project to exclude imported items
- Click EXPORT - Choose a location to save the JSON file
Share the exported .json file with team members via email, cloud storage, or version control.
Importing
Section titled “Importing”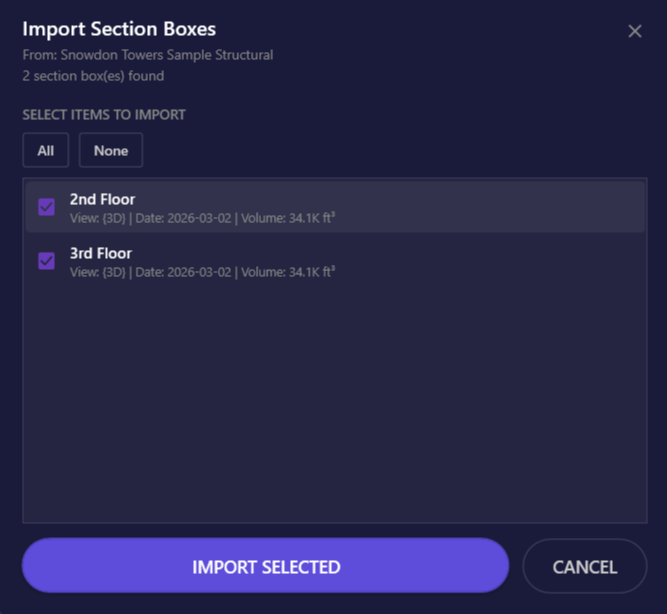
- Click IMPORT - Opens a file browser to select a JSON file
- Preview items - Review the list of section boxes; check/uncheck items to select
- Use All/None buttons to quickly select or deselect all items
- Click IMPORT SELECTED
Handling Conflicts
Section titled “Handling Conflicts”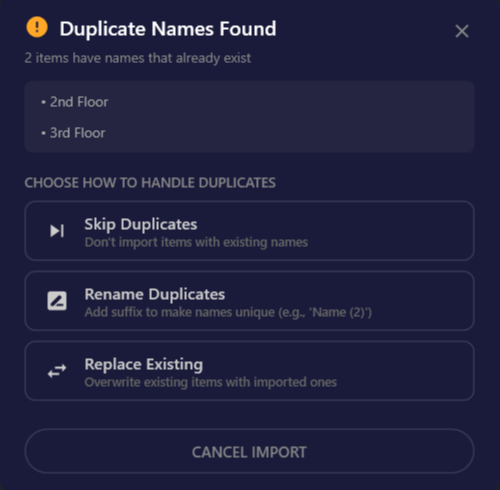
If imported names conflict with existing entries, you’ll choose how to handle them:
| Option | Behavior |
|---|---|
| Skip Duplicates | Don’t import items with names that already exist |
| Rename Duplicates | Add suffix to make names unique (e.g., “Name (2)“) |
| Replace Existing | Overwrite existing items with imported versions |
| Cancel Import | Abort the import operation |
User Interface
Section titled “User Interface”Main Window
Section titled “Main Window”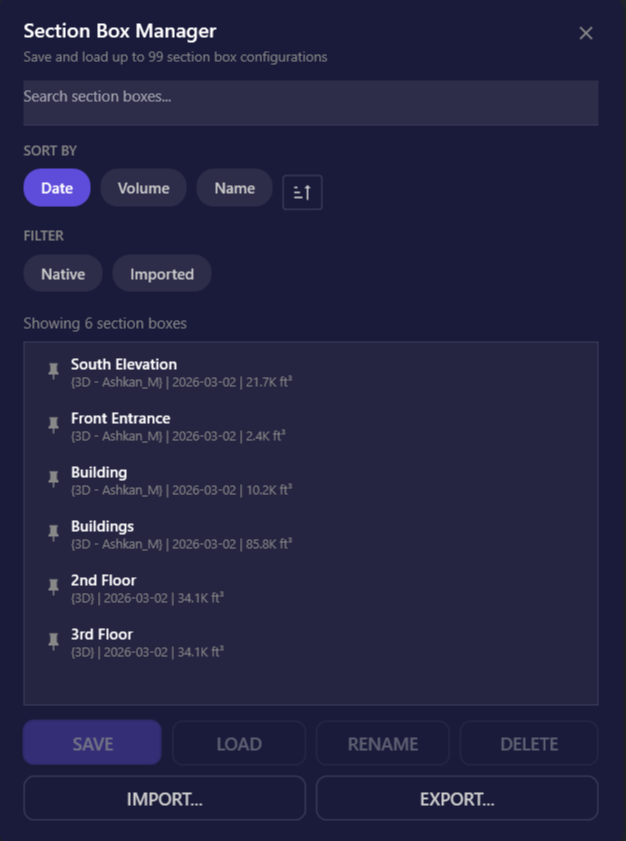
| Element | Description |
|---|---|
| Search box | Filter list by typing name, view, or date |
| Sort chips | Choose sort order (Date, Volume, Name) |
| Sort direction | Toggle ascending/descending |
| Filter chips | Show Native and/or Imported items |
| Status text | Shows count and current filter state |
| Section box list | Saved configurations with thumbnails on hover |
| SAVE | Save current section box (requires active section box) |
| LOAD | Apply selected section box to active view |
| RENAME | Change name of selected section box |
| DELETE | Remove selected section box(es) |
| IMPORT | Import section boxes from JSON file |
| EXPORT | Export section boxes to JSON file |
Keyboard shortcuts:
| Key | Action |
|---|---|
Enter | Load selected section box |
Delete | Delete selected section box(es) |
ESC | Hide window |
List Item Details
Section titled “List Item Details”Each item in the list displays:
- Name - User-assigned name
- View name - Name of the view when saved
- Date - Creation timestamp
- Volume - Calculated volume (ft^3, K ft^3, or M ft^3)
- Pin button - Click to pin/unpin
Hover over an item to see its thumbnail preview.
Use Cases
Section titled “Use Cases”- Design Coordination - Save section boxes for recurring coordination areas (e.g., “MEP Shaft Level 3”, “Structural Connection Detail”)
- Presentation Views - Create consistent cropped views for client presentations
- Team Collaboration - Export saved section boxes to share with team members
- Quality Review - Save section boxes for areas requiring repeated inspection
Tips & Best Practices
Section titled “Tips & Best Practices”- Naming convention - Use descriptive names that identify location and purpose (e.g., “L3 Mechanical Room - Coordination”)
- Pin frequently-used - Pin your most-used section boxes to keep them accessible
- Combine with Smart Section Box - Use Smart Section Box to create section boxes, then save them here for permanent storage (unlike Smart Section Box’s session-only history)
- Worksharing - The tool uses the central file’s GUID, so all team members working on the same project share the same collection (after importing)
Limitations
Section titled “Limitations”| Limitation | Details |
|---|---|
| Maximum 99 items | Each project can store up to 99 section box configurations |
| Local storage | Data is stored on the local machine, not in the Revit project file |
| Active section box required | Save is disabled unless the active view has a visible section box |
| No undo support | Loading a section box cannot be undone via Revit’s undo; use another saved configuration to revert |
Troubleshooting
Section titled “Troubleshooting”SAVE button is disabled
Section titled “SAVE button is disabled”The active view must be a 3D view with section box enabled. Check that:
- You’re in a 3D view (not plan, section, or elevation)
- The section box is turned on (View Properties > Section Box = Yes)
Thumbnail shows wrong view
Section titled “Thumbnail shows wrong view”Thumbnails are captured from the active Revit window when you save. Ensure your view is properly oriented before clicking Save. The capture extracts the center portion of the Revit window.
Import file not recognized
Section titled “Import file not recognized”Ensure the file is a valid JSON export from Section Box Manager.
Section boxes don’t appear for team members
Section titled “Section boxes don’t appear for team members”Section box data is stored locally, not in the Revit model. Each team member must import the shared JSON file to access the configurations. Consider storing exported JSON files on a network drive or ACC so the team always has access to the latest configurations.
Related Tools
Section titled “Related Tools”- Smart Section Box - Create intelligently rotated section boxes
- Section Box by Edge - Create section boxes aligned to a picked edge
- View from Section Box - Create 2D views from section box extents
- Align View to Section Box - Orient 3D view to match section box