Template Manager
Template Manager provides comprehensive tools for analyzing and managing view templates in Revit projects. It helps BIM managers and project leads identify views without templates, discover unused templates that can be purged, and apply templates in bulk. The modeless window design allows continuous workflow integration while working in Revit.
Getting Started
Section titled “Getting Started”Find Template Manager on the Amorphous ribbon tab in the Data Tools panel.
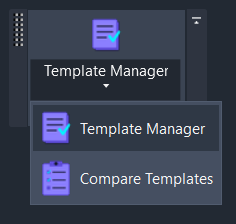
The split button provides two commands:
| Command | Description |
|---|---|
| Template Manager (main button) | Opens the audit and management window |
| Compare Templates (dropdown) | Opens the template comparison tool |
The tool requires an open Revit document to function.
Features
Section titled “Features”- Sheet and View Auditing - Analyze all sheets and their placed views to identify template usage patterns
- Template Usage Statistics - See which templates are used, how many views and sheets use each, and which view types they apply to
- Problem Detection - Highlight sheets with no views, views missing templates, and unused templates
- Bulk Template Assignment - Apply or clear templates on multiple selected views at once
- Purge Unused Templates - Delete all unused view templates with confirmation
- Excel Export - Export audit results to a formatted Excel workbook with three worksheets
- Real-time Filtering - Search, filter by view type, and toggle problem-focused views
- Navigation - Double-click any sheet or view to navigate to it in Revit
How to Use
Section titled “How to Use”Basic Workflow
Section titled “Basic Workflow”- Launch the tool - Click Template Manager on the ribbon
- Review the summary - The summary bar shows total counts and highlights problems
- Explore the data - Use the three-column layout to navigate sheets, views, and templates
- Take action - Apply templates, clear assignments, purge unused, or export to Excel
Auditing Template Usage
Section titled “Auditing Template Usage”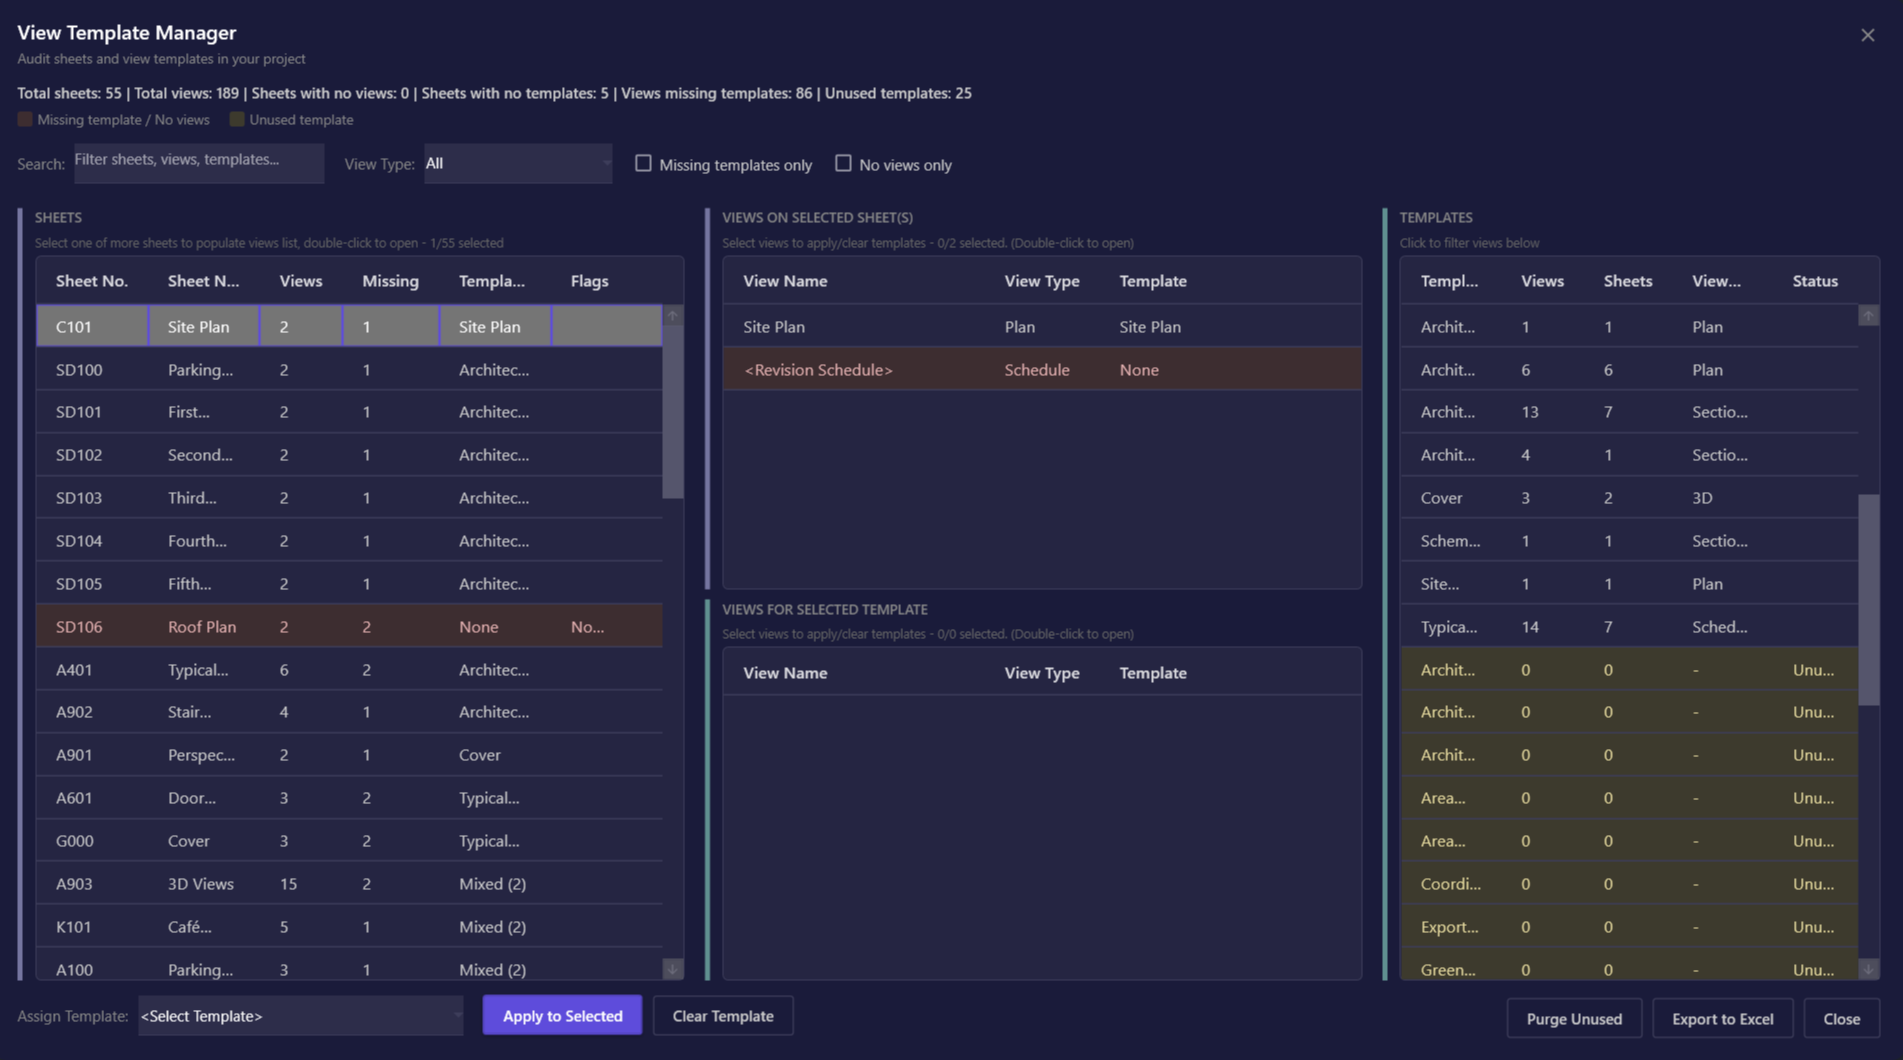
- Launch Template Manager - the window opens and automatically scans all sheets, views, and templates
- Review the summary bar at the top showing:
- Total sheets, views, and templates
- Problem counts (sheets with no views, views missing templates, unused templates)
- Use the three-column layout:
- Left (Sheets): All project sheets with template status
- Middle (Views): Views on selected sheet(s) and views using selected template
- Right (Templates): All view templates with usage statistics
- Select sheets to see their views in the upper-middle panel
- Select a template to see all views using it in the lower-middle panel
Applying Templates
Section titled “Applying Templates”- Select views from either views panel (use Ctrl+Click or Shift+Click for multi-select)
- Choose a template from the “Assign Template” dropdown at the bottom
- Click “Apply to Selected” to apply the template
- Review the confirmation showing success count and any skipped views
Clearing Templates
Section titled “Clearing Templates”- Select views that have templates assigned
- Click “Clear Template” to remove template assignments
- Views will revert to their individual settings
Purging Unused Templates
Section titled “Purging Unused Templates”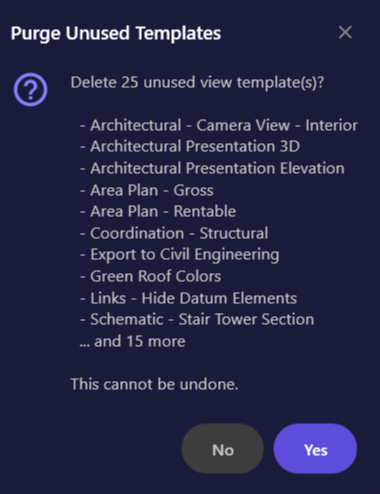
- In the Templates panel, unused templates show “Unused” status with yellow highlighting
- Click “Purge Unused” to delete all unused templates
- Review the confirmation list showing which templates will be deleted
- Click Yes to proceed or No to cancel
Exporting to Excel
Section titled “Exporting to Excel”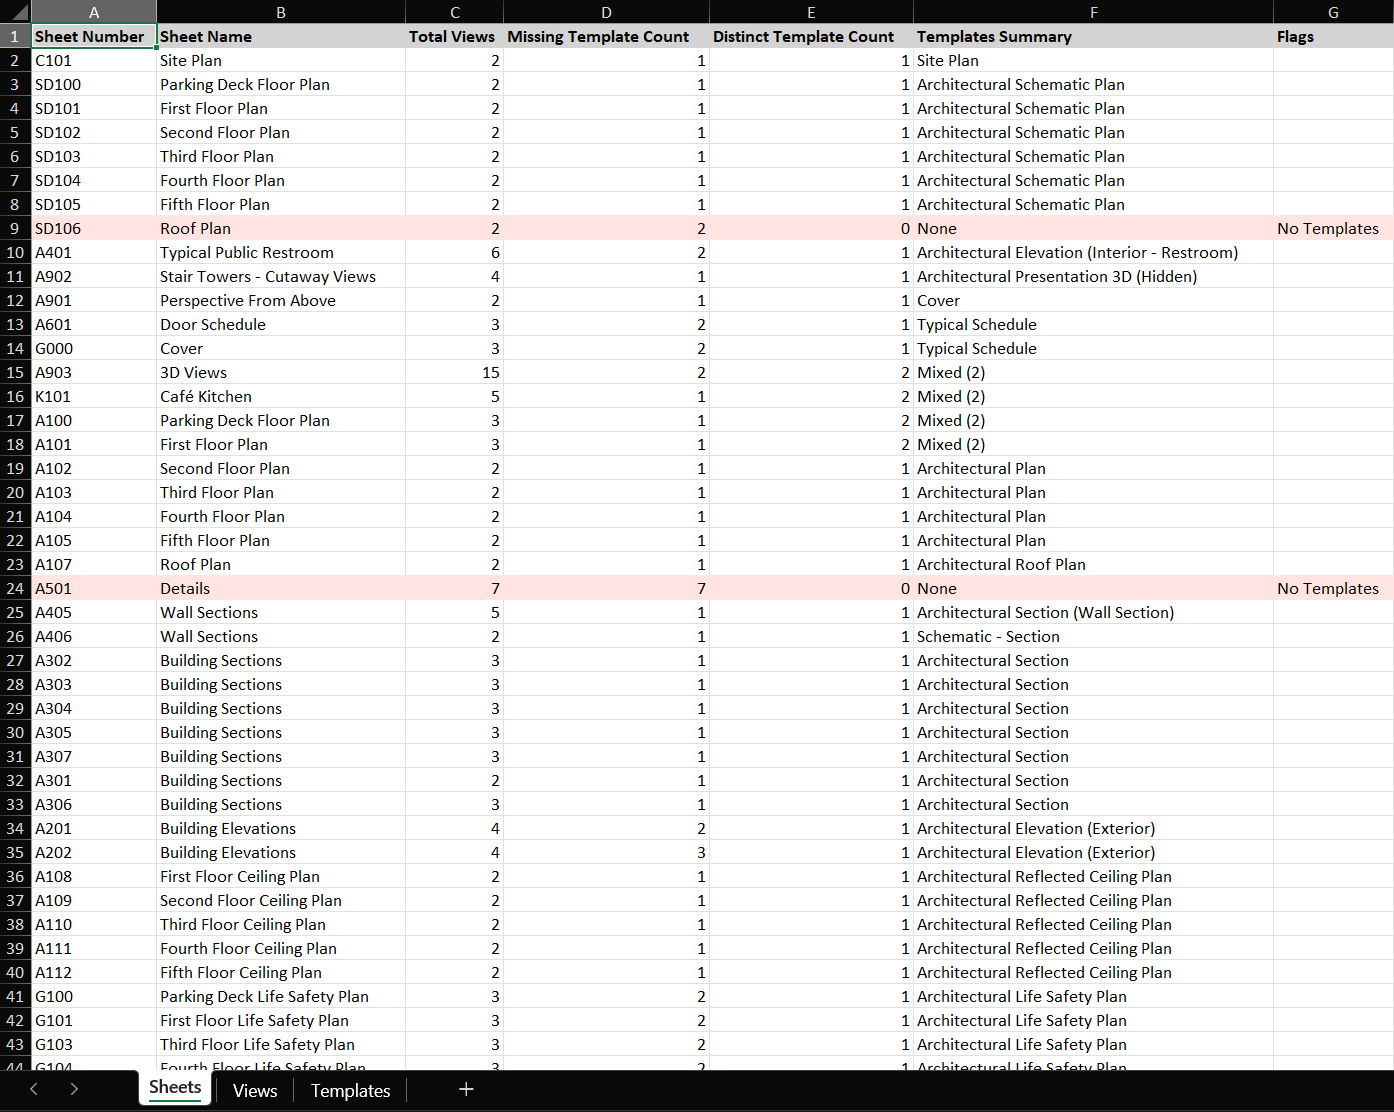
- Click “Export to Excel” in the bottom-right
- Choose a save location (defaults to Downloads folder with project name)
- The Excel file contains three worksheets:
| Worksheet | Contents |
|---|---|
| Sheets | Sheet number, name, view counts, template summary, problem flags |
| Views | Sheet info, view name, view type, and assigned template |
| Templates | Template name, view count, sheet count, view types, usage status |
Navigating to Views
Section titled “Navigating to Views”Double-click any sheet or view in the lists to navigate to it in Revit. The Revit canvas will switch to show the selected item.
User Interface
Section titled “User Interface”Summary Bar
Section titled “Summary Bar”
The summary bar at the top provides at-a-glance statistics:
| Statistic | Description |
|---|---|
| Sheets | Total number of sheets in the project |
| Views | Total number of placed views on sheets |
| Templates | Total number of view templates |
| Missing Templates | Views that have no template assigned (problem indicator) |
| No Views | Sheets that have no views placed (problem indicator) |
| Unused | Templates not applied to any view (can be purged) |
Problem counts are highlighted to draw attention to items needing review.
Three-Column Layout
Section titled “Three-Column Layout”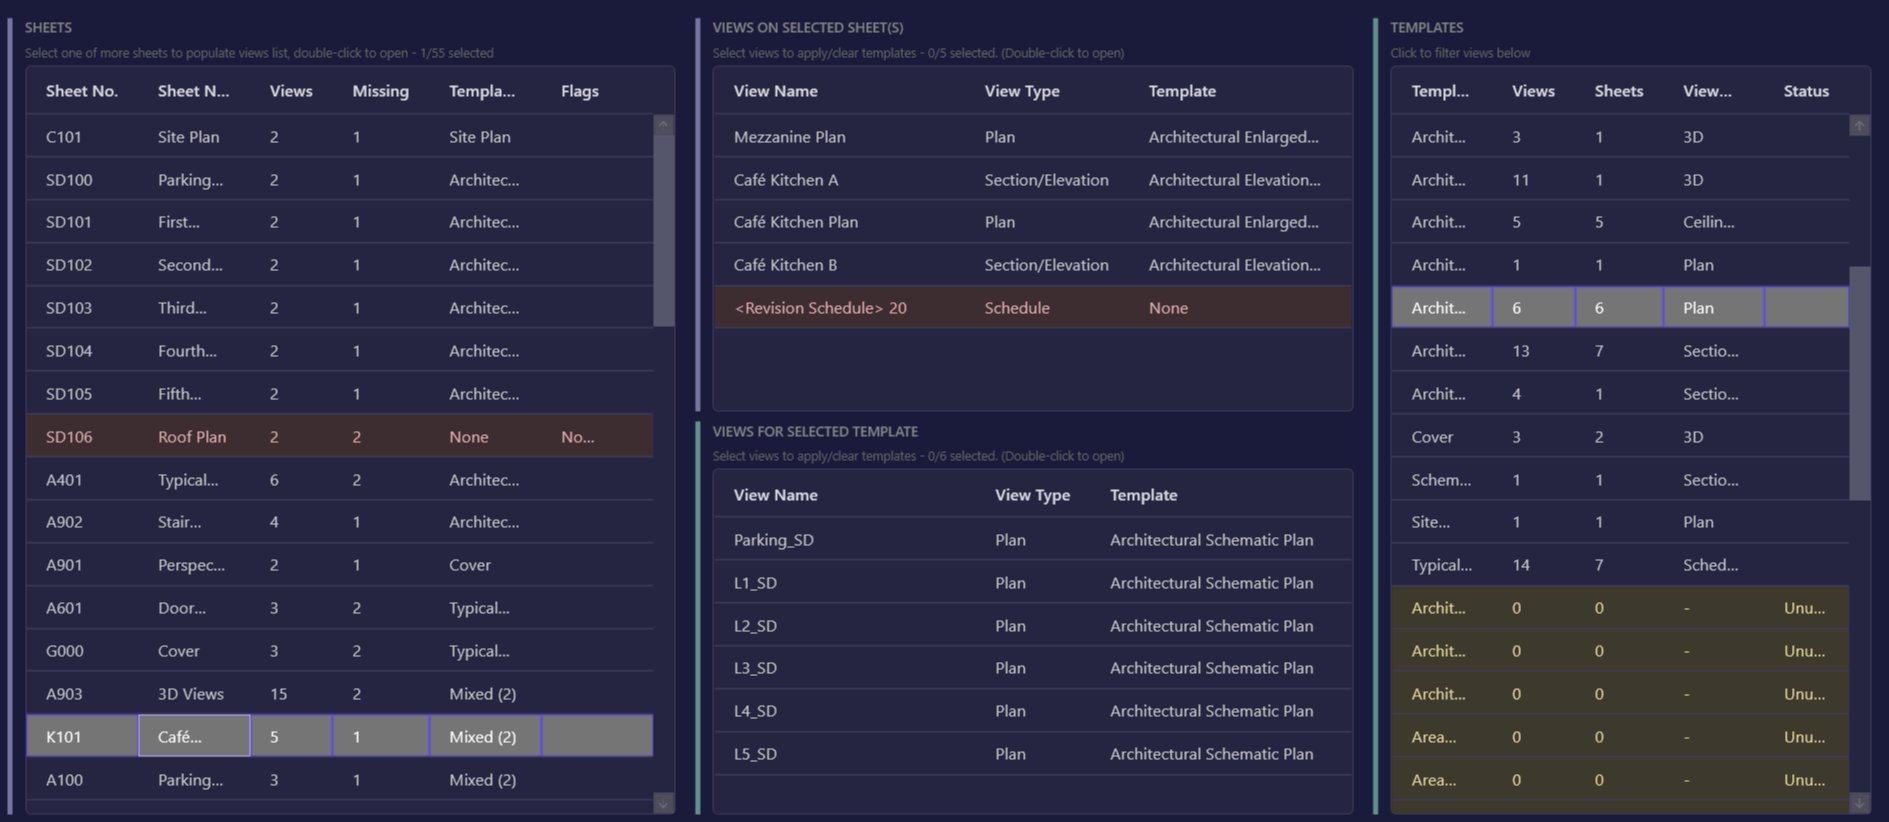
The main window uses a three-column layout for efficient navigation:
Left Column - Sheets
- Lists all sheets in the project
- Columns: Number, Name, Views (count), Template Status
- Template Status shows: “All Applied”, “Missing (#)”, or “No Views”
Middle Column - Views (two panels)
- Upper panel: Views placed on the selected sheet(s)
- Lower panel: Views using the selected template
- Columns: View Name, Type, Template, Sheet (if applicable)
Right Column - Templates
- Lists all view templates with usage statistics
- Columns: Name, Views (count), Sheets (count), View Types
- Unused templates are highlighted in yellow
Filter Bar
Section titled “Filter Bar”
| Control | Description |
|---|---|
| Search | Text search across sheets, views, and templates (case-insensitive) |
| View Type | Filter by view type: All, 3D View, Floor Plan, Ceiling Plan, Section, Elevation, etc. |
| Missing templates only | Show only views/sheets missing template assignments |
| No views only | Show only sheets with no placed views |
Filters apply in real-time as you type or change selections.
Action Buttons
Section titled “Action Buttons”
| Button | Description |
|---|---|
| Assign Template (dropdown) | Select a template to apply |
| Apply to Selected | Apply the selected template to highlighted views |
| Clear Template | Remove template assignment from selected views |
| Purge Unused | Delete all unused templates |
| Export to Excel | Save audit data to Excel workbook |
| Close | Close the Template Manager window |
Options & Settings
Section titled “Options & Settings”| Option | Location | Description | Default |
|---|---|---|---|
| Search | Filter bar | Text search across sheets, views, templates | Empty |
| View Type | Filter bar | Filter by view type (All, 3D, Plan, Section, etc.) | All |
| Missing templates only | Filter bar | Show only views/sheets missing templates | Off |
| No views only | Filter bar | Show only sheets with no placed views | Off |
Tips & Best Practices
Section titled “Tips & Best Practices”- Start with the summary bar - Quickly identify if there are problems that need attention
- Use filters strategically - Enable “Missing templates only” during QA reviews
- Multi-select for efficiency - Select multiple views before applying templates to save time
- Compare before applying - Use Compare Templates to understand the impact of switching templates
- Export for documentation - Create Excel reports for project handoff or QA documentation
- Regular purging - Periodically purge unused templates to keep the project clean
- Double-click to navigate - Quickly jump to problem views without leaving the window
- Keep the window open - The modeless design lets you work in Revit while the window stays accessible
Limitations
Section titled “Limitations”| Limitation | Details |
|---|---|
| Schedules | Template detection for schedules may not work for all schedule types |
| Linked Models | Only analyzes the active document, not linked models |
| View Types | Some specialized view types (e.g., Walkthroughs, Renderings) may have limited template compatibility |
| Purge | Template deletion is permanent and cannot be undone |
| View selection | Cannot select views across both middle panels simultaneously |
Troubleshooting
Section titled “Troubleshooting”Template not applying to some views
Section titled “Template not applying to some views”Cause: Templates must be compatible with the view type. A Floor Plan template cannot be applied to a Section view.
Solution: Filter by view type to ensure you’re selecting compatible views. The confirmation message will indicate how many views were skipped due to incompatibility.
Search not finding items
Section titled “Search not finding items”Cause: The search looks for the text in visible columns.
Solution: Search is case-insensitive and searches across all visible columns (sheet numbers, names, view names, template names). Ensure the item isn’t being filtered out by the View Type or checkbox filters.
Window blocking Revit
Section titled “Window blocking Revit”Cause: The window is modeless but may appear in front.
Solution: Click anywhere in Revit to work in the model. The Template Manager window stays open and accessible. You can also minimize it to the taskbar.
Data doesn’t reflect recent changes
Section titled “Data doesn’t reflect recent changes”Cause: The window captures data when it opens.
Solution: Close and reopen the Template Manager to refresh the data after making changes outside the tool (like creating new templates or placing views).
ESC key closes window
Section titled “ESC key closes window”This is intentional behavior for quick dismissal. Use the Close button if you prefer clicking.
Purge Unused button is disabled
Section titled “Purge Unused button is disabled”Cause: There are no unused templates in the project.
Solution: The button enables when at least one template has zero views assigned.
Use Cases
Section titled “Use Cases”| Scenario | Solution |
|---|---|
| QA check before deliverable | Review sheets with “No Templates” or “Missing” flags using the filter checkboxes |
| Standardize floor plan templates | Filter by “Floor Plan” view type, select views, apply the correct template |
| Clean up project templates | Review Templates panel for unused items, click Purge Unused |
| Troubleshoot template differences | Use Compare Templates to see exact parameter variations |
| Document template usage | Export to Excel for reporting or project handoff |
| Find views without templates | Enable “Missing templates only” checkbox |
| Identify empty sheets | Enable “No views only” checkbox |
Related Tools
Section titled “Related Tools”- Compare Templates - Compare two view templates side-by-side to identify parameter differences
- Export VG - Save visibility/graphics settings to share across projects
- Import VG - Load visibility/graphics settings from exported files
- Transfer VG - Copy visibility/graphics settings between views
- QuickVis - Quick visual style and detail level changes